调试是任何编程开发中的重要部分。 在Apex中,我们有一些工具用于调试。 其中之一是system.debug()方法,它在调试日志中打印变量的值和输出。
有两个工具,你可以进行调试:
- 开发者控制台
- 调试日志
通过开发者控制台进行调试
您可以使用开发人员控制台并执行匿名功能来调试Apex,如下所示:
例如:
考虑我们现有的获取今天创建的客户记录的例子。 我们只想知道查询是否返回结果,如果是,那么我们想检查List的值。
将以下代码粘贴到执行匿名窗口中,并按照我们为打开执行匿名窗口所执行的步骤。
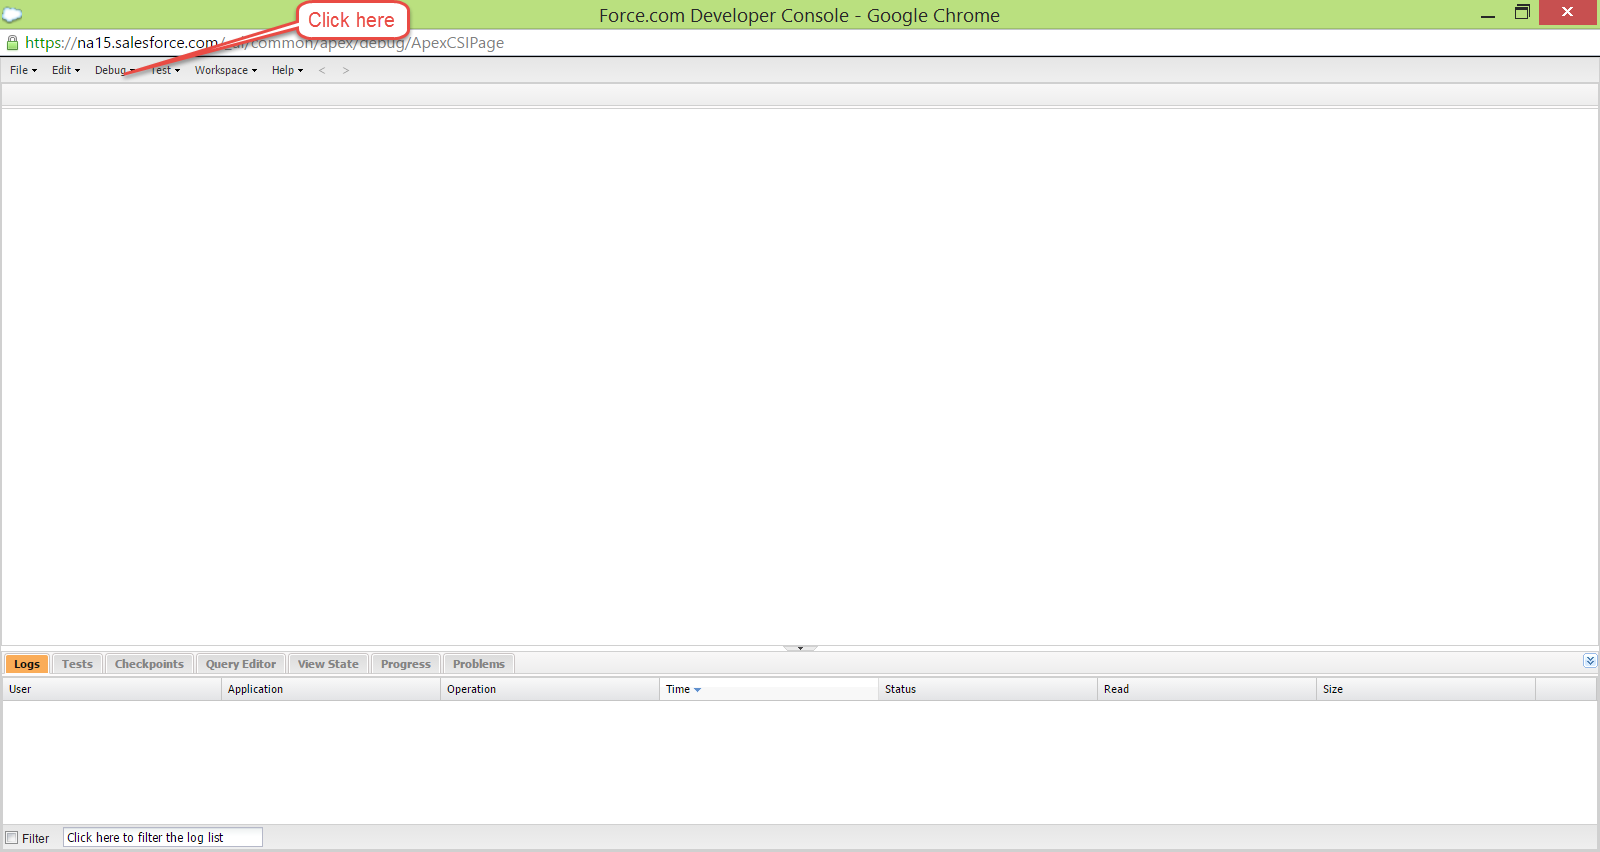
第1步:打开开发人员控制台
第2步:从“Debug”中打开执行匿名,如下所示:
第3步:打开执行匿名窗口并粘贴以下代码,然后单击执行。
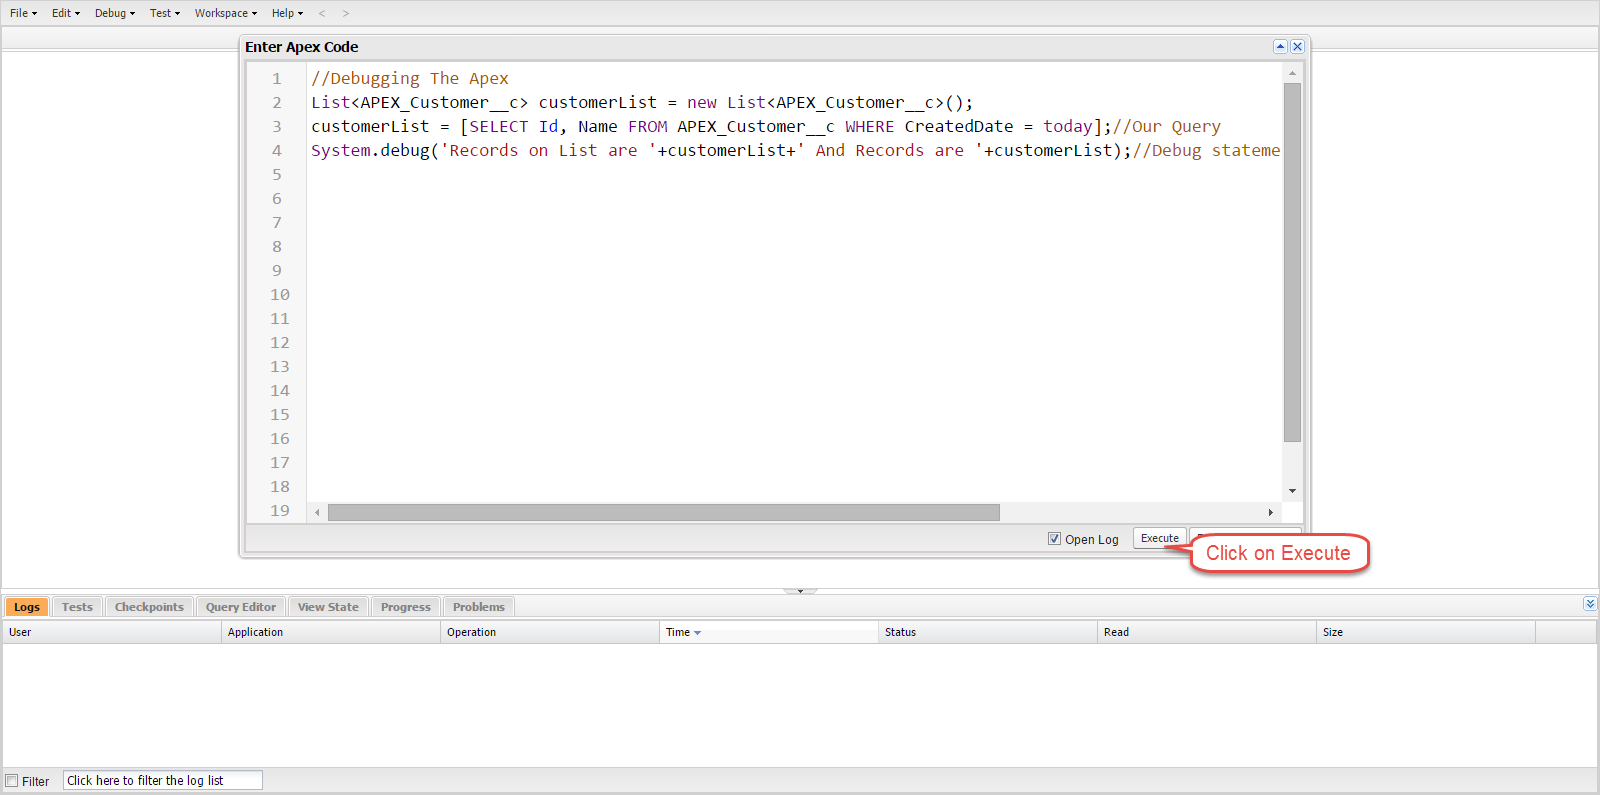
//Debugging The ApexList<apex_customer__c> customerList = new List<apex_customer__c>();customerList = [SELECT Id, Name FROM APEX_Customer__c WHERE CreatedDate = today];//Our QuerySystem.debug('Records on List are '+customerList+' And Records are '+customerList);//Debug statement to check the value of List and Size
第4步: 打开日志,如下所示
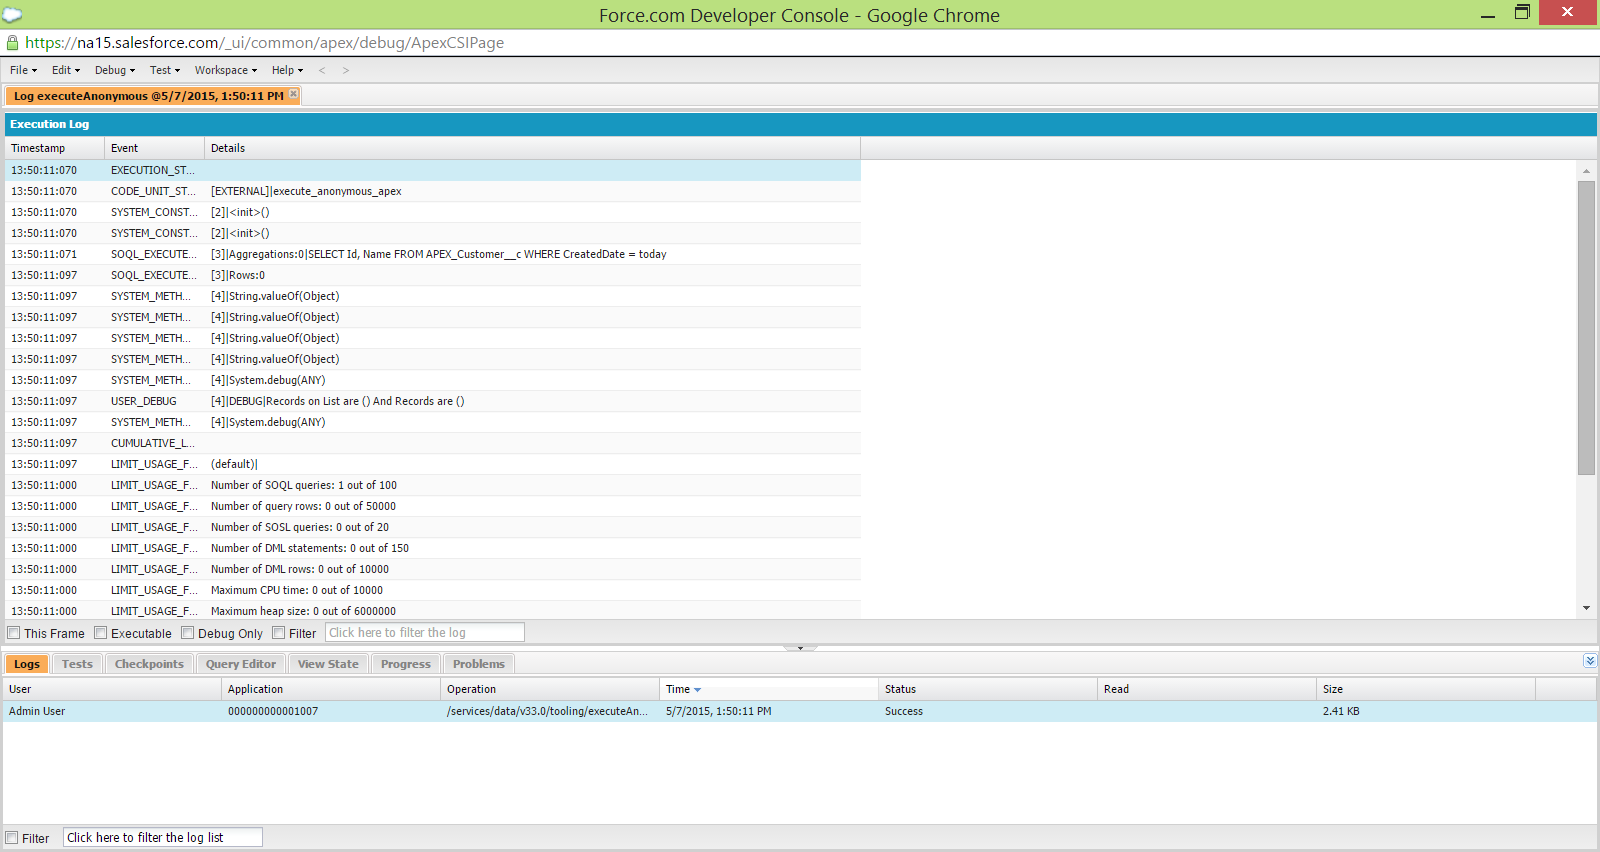
在过滤条件中输入“USER”,如下所示

第5步: 如下所示打开USER DEBUG语句
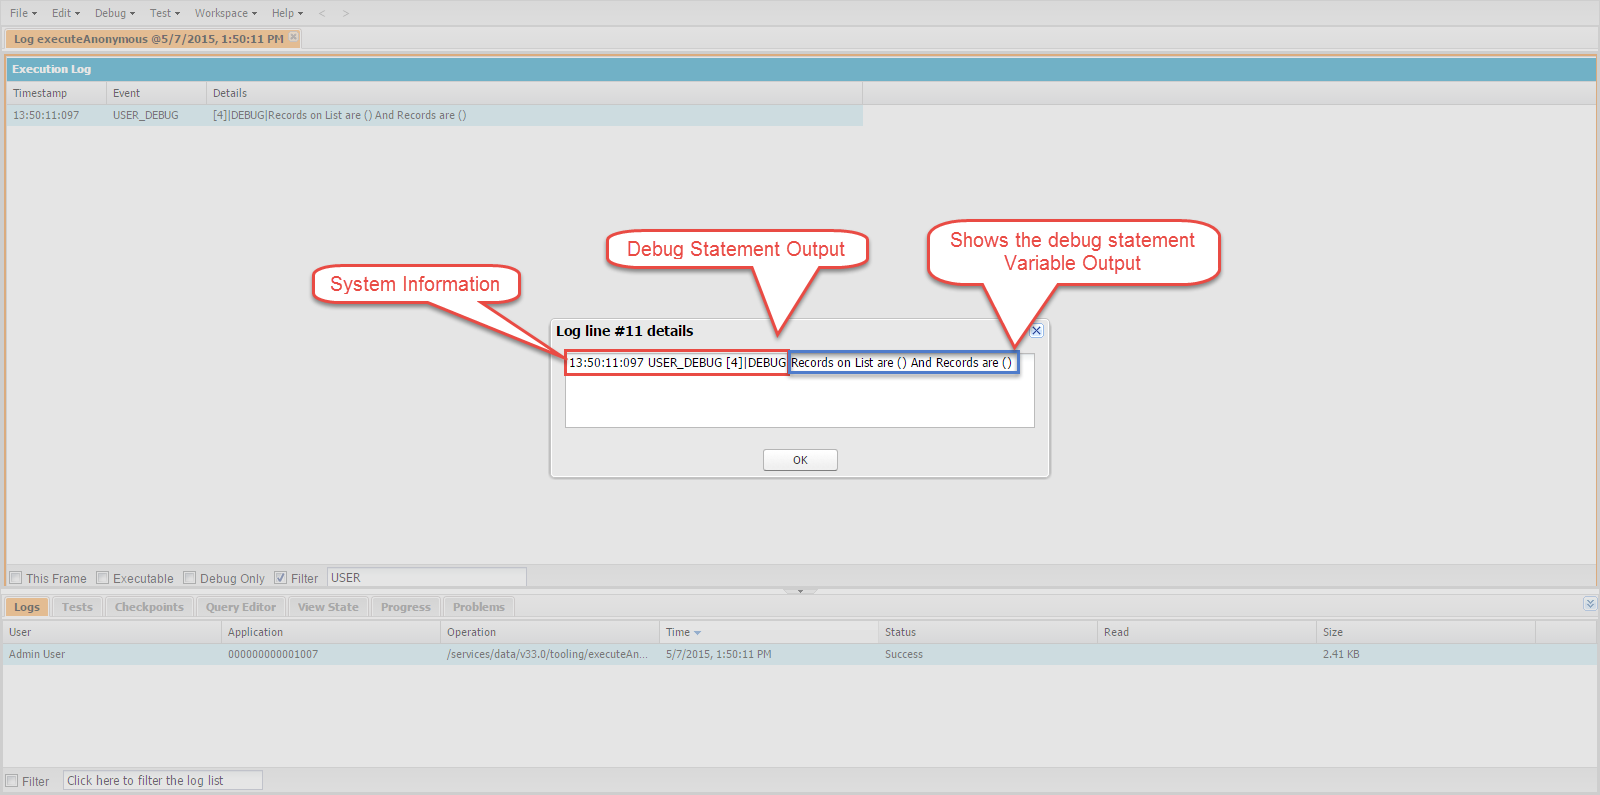
第6步:检查错误或变量值,您可以通过它检查和调试代码。
通过调试日志调试
你可以通过调试日志调试同一个类。 假设您在Customer对象中有一个触发器,并且您希望针对一些变量值调试此触发器。 然后你可以通过如下所示方法调试日志:
这是触发代码,如果修改的客户处于活动状态并且要检查当前范围内的变量和记录的值,则更新描述字段:
trigger CustomerTrigger on APEX_Customer__c (before update) {
    List<apex_customer__c> customerList = new List<apex_customer__c>();
    for (APEX_Customer__c objCust: Trigger.new) {
        System.debug('objCust current value is'+objCust);
        if (objCust.APEX_Active__c == true) {
            objCust.APEX_Customer_Description__c = 'updated';
            System.debug('The record which has satisfied the condition '+objCust);
        }
    }
}
执行以下步骤来生成调试日志。
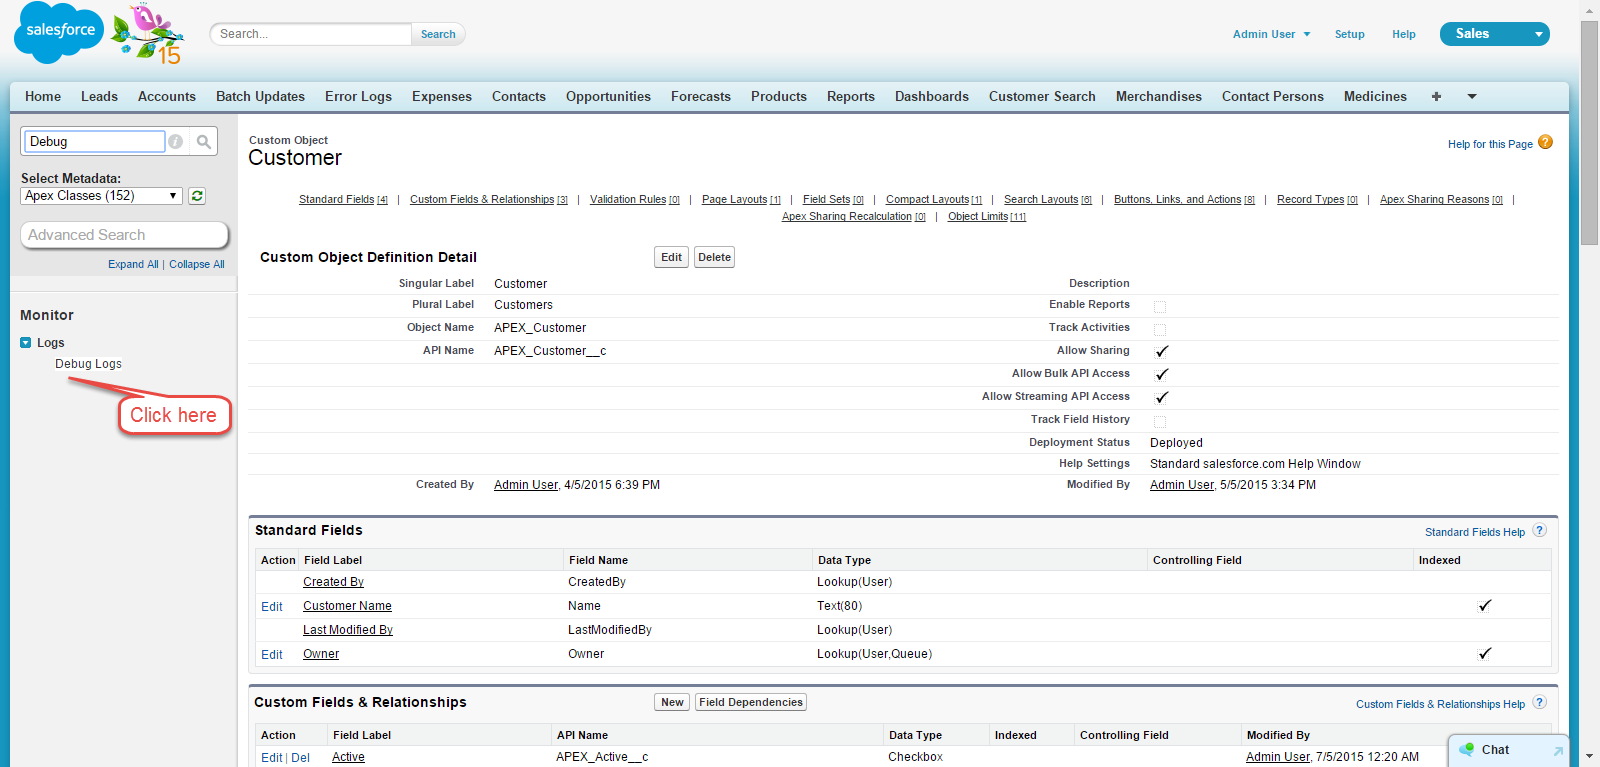
第1步:为您的用户设置调试日志。 转到安装程序并在搜索设置窗口中键入“调试日志”,然后单击链接。
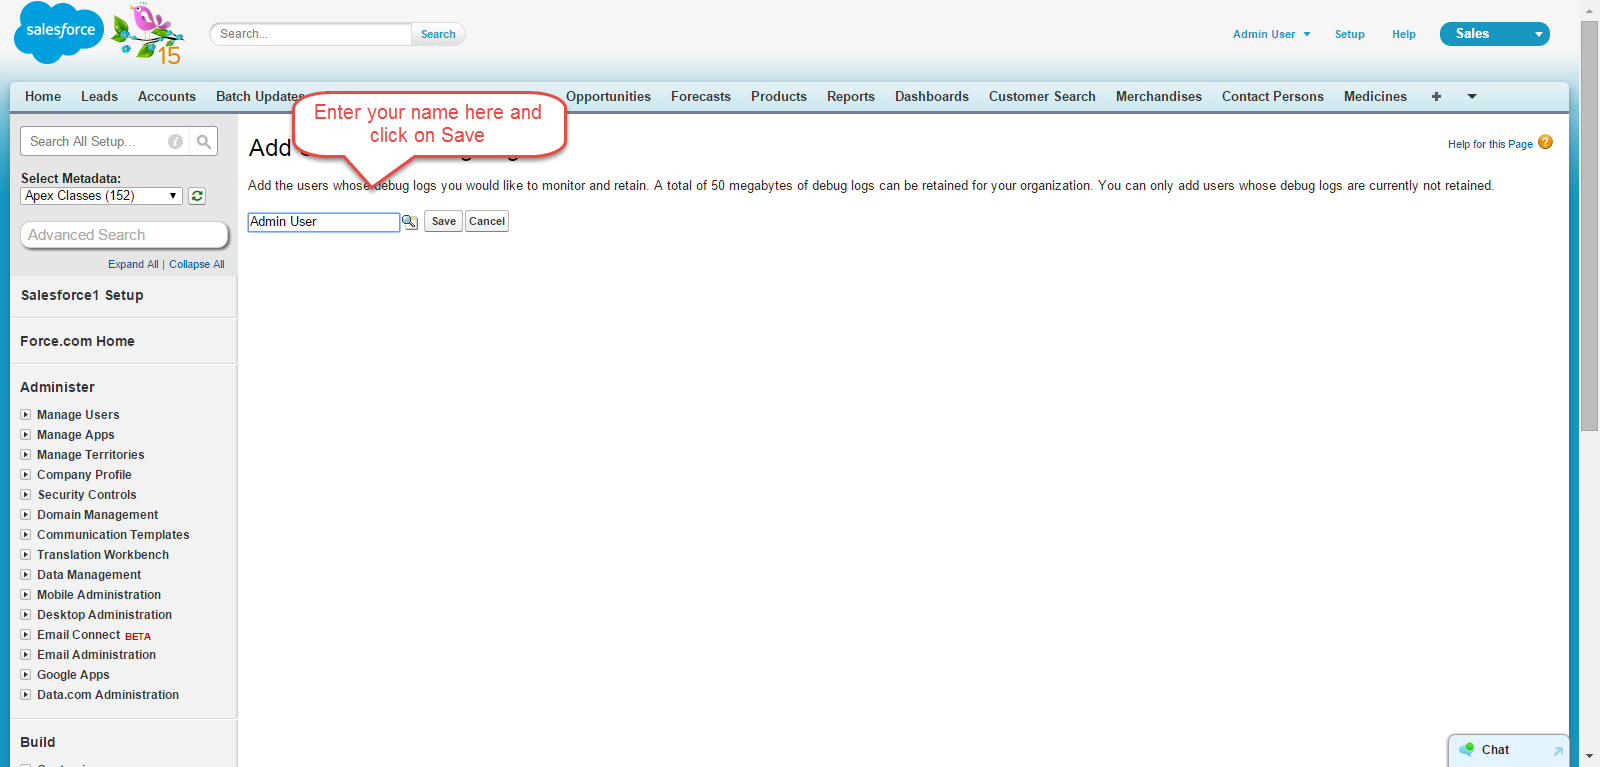
第2步: 设置调试日志如下:


第3步: 输入您要设置的用户名称。 输入你的名字。
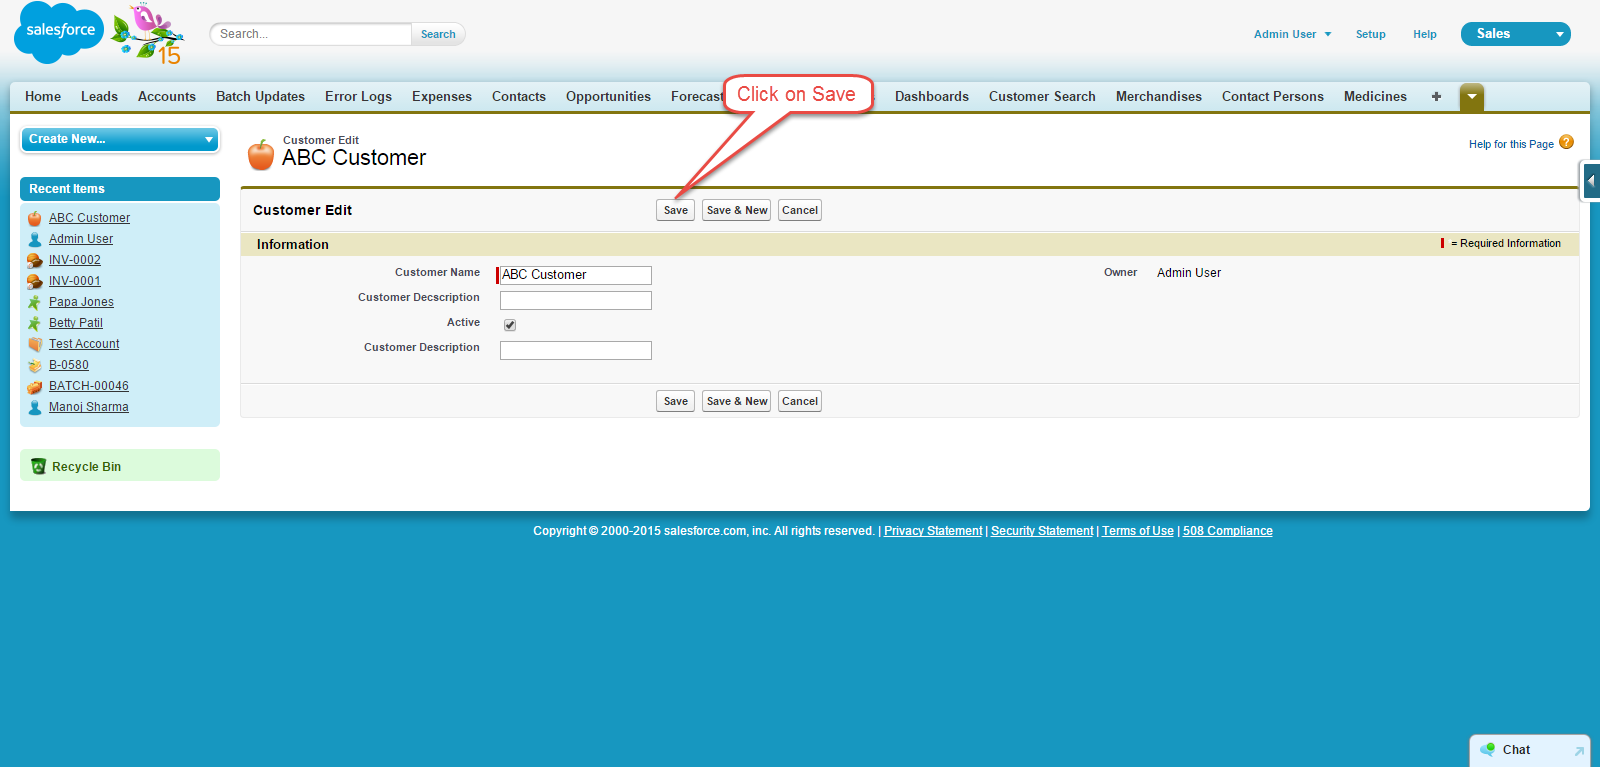
第4步:修改客户记录,因为事件应该发生以生成调试日志。
第5步: 现在再次转到调试日志部分。 打开调试日志并单击重置。

第6步: 单击第一个调试日志的视图链接。

第7步: 使用浏览器搜索来搜索字符串'USER',如下所示:
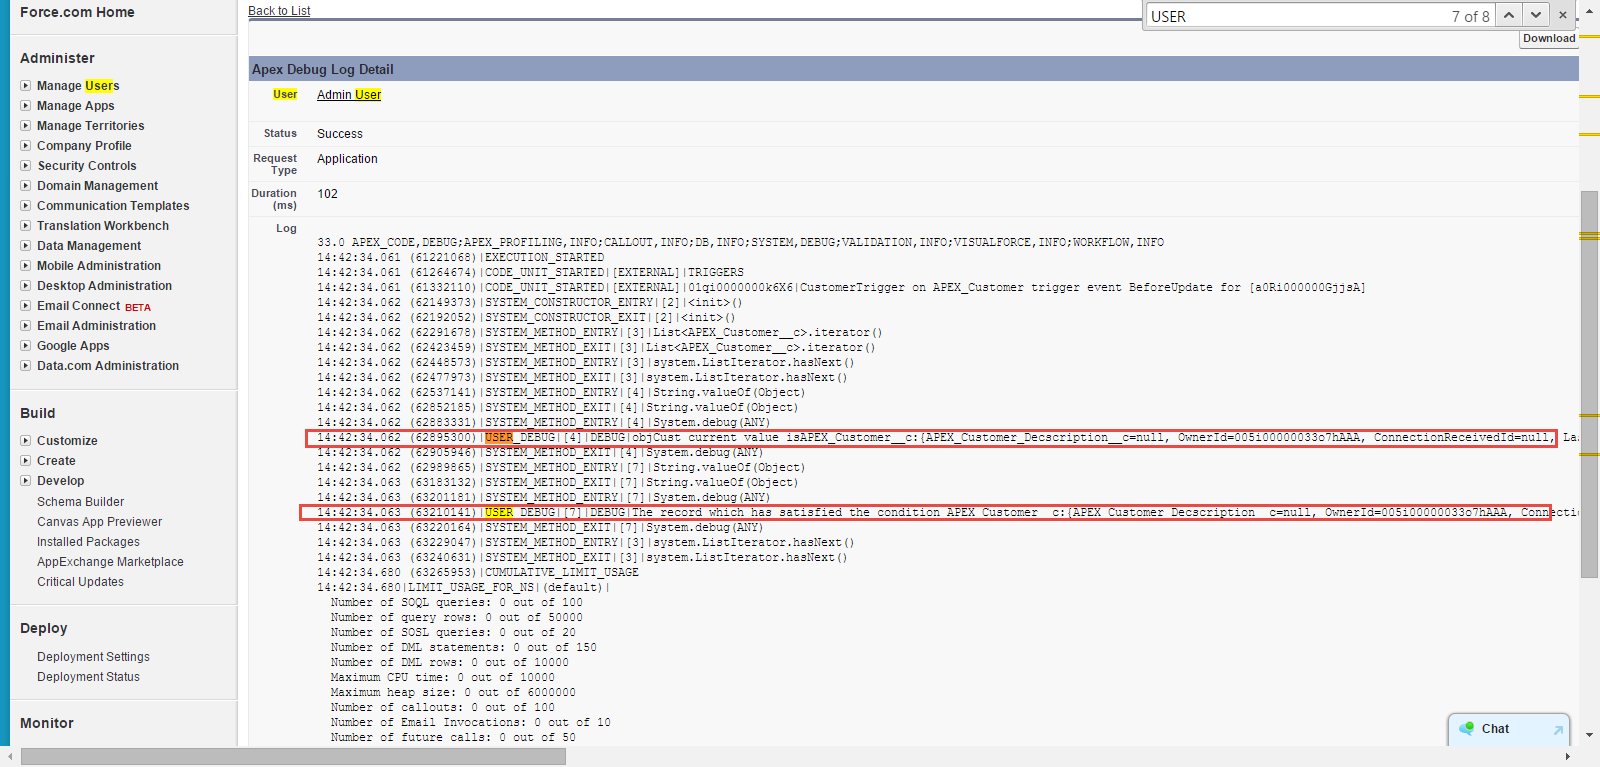
调试语句显示我们设置点的字段的值。